HOME IMPROVEMENT
Best Practices for Efficient Yard Waste Disposal
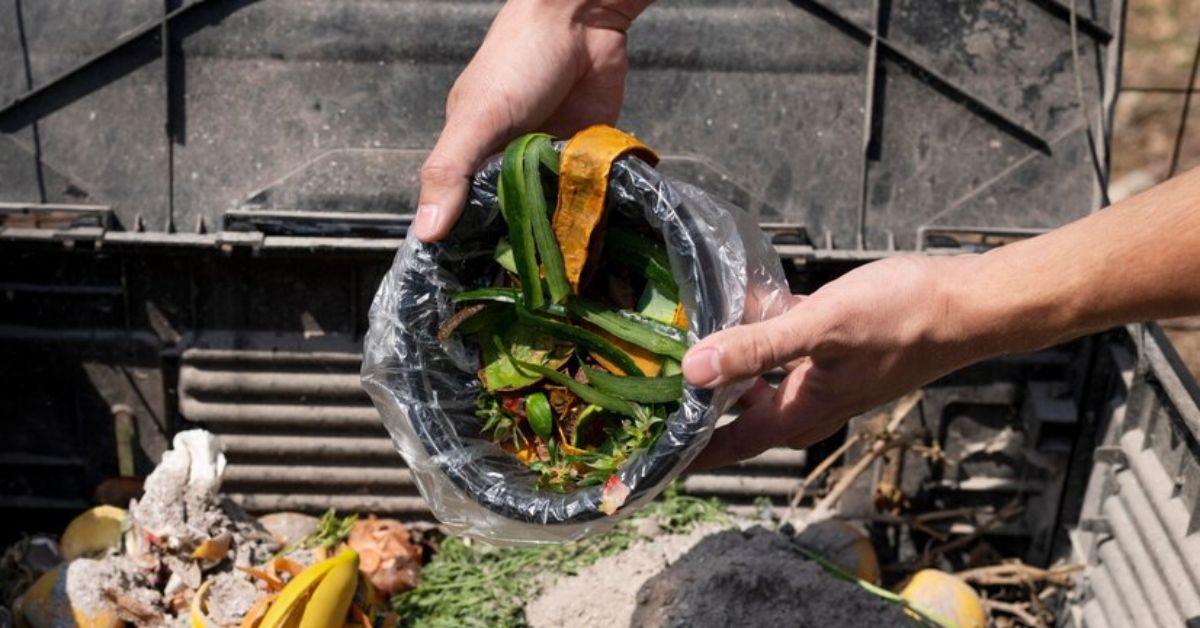
Maintaining a beautiful yard can be a rewarding experience, but it often involves managing large amounts of yard waste. Whether you’re dealing with fallen leaves in the fall, trimming trees and bushes, or simply keeping your lawn tidy, efficient yard waste disposal is essential. Proper disposal not only helps keep your property looking its best but also ensures environmental sustainability. This article will provide top tips for efficient yard waste disposal, helping you manage your yard debris effectively and responsibly.
Understanding Yard Waste
Before diving into disposal methods, it’s important to understand what constitutes yard waste. Yard waste includes organic materials such as:
- Grass clippings
- Leaves
- Branches and twigs
- Shrubbery trimmings
- Garden debris (weeds, old plants)
- Tree stumps and logs
- Mulch
These materials are biodegradable and can often be recycled or composted, making them different from household waste or hazardous materials. Proper management of yard waste can contribute significantly to environmental health by reducing landfill use and promoting composting and recycling.
Planning Your Yard Cleanup
Efficient yard waste disposal starts with proper planning. By organizing your yard cleanup efforts, you can save time and ensure that all debris is managed effectively. Here are some steps to plan your yard cleanup:
- Assess Your Yard: Walk around your yard to identify the areas that need attention. Make a list of tasks, such as raking leaves, trimming bushes, or removing fallen branches.
- Gather Tools and Supplies: Ensure you have the necessary tools for the job, including rakes, pruners, gloves, and trash bags. Having the right equipment on hand will make the cleanup process more efficient.
- Create a Schedule: Depending on the size of your yard and the amount of work needed, you may want to break the cleanup into manageable tasks spread over several days or weekends. This approach prevents burnout and makes the project less overwhelming.
- Set Up Disposal Stations: Designate specific areas for different types of yard waste. For example, have separate piles for leaves, branches, and grass clippings. This segregation makes it easier to dispose of or recycle the waste later.
Using a Yard Waste Dumpster Rental
One of the most efficient ways to manage yard waste is by renting a yard waste dumpster. This option is especially useful for large-scale cleanups or landscaping projects that generate a significant amount of debris. Here are some benefits of using a yard waste dumpster rental:
- Convenience: A yard waste dumpster provides a central location for all your yard debris, making it easy to dispose of waste as you work. This convenience saves time and effort compared to making multiple trips to a landfill or recycling center.
- Capacity: Yard waste dumpsters come in various sizes, allowing you to choose one that fits the scope of your project. Whether you’re cleaning up a small garden or undertaking a major landscaping project, there’s a dumpster size that suits your needs.
- Environmental Benefits: Many dumpster rental Palm Harbor companies prioritize environmentally friendly disposal methods. They often work with recycling facilities to ensure that yard waste is composted or recycled, reducing the environmental impact.
- Cost-Effective: Renting a yard waste dumpster can be cost-effective, especially for large projects. The rental fee typically includes delivery, pickup, and disposal, providing a comprehensive solution at a reasonable cost.
Composting Yard Waste
Composting is an eco-friendly way to dispose of yard waste and create nutrient-rich soil for your garden. By composting, you recycle organic materials back into the earth, reducing landfill waste and enhancing soil health. Here are some tips for successful composting:
- Choose a Composting Method: There are various composting methods, including traditional compost bins, tumblers, and pile composting. Choose a method that suits your space and needs.
- Balance Green and Brown Materials: Composting requires a balance of green materials (nitrogen-rich) and brown materials (carbon-rich). Green materials include grass clippings and vegetable scraps, while brown materials include leaves and small branches. Aim for a ratio of roughly three parts brown to one part green.
- Maintain Moisture: Keep your compost pile moist, but not waterlogged. The ideal moisture level is similar to a damp sponge. Water the pile as needed, especially during dry periods.
- Turn the Pile: Regularly turning or mixing your compost pile helps aerate it and speeds up the decomposition process. Turn the pile every few weeks to ensure even breakdown of materials.
- Avoid Certain Materials: Do not add meat, dairy, diseased plants, or pet waste to your compost pile. These items can attract pests and create unpleasant odors.
Mulching Yard Waste
Mulching is another effective way to recycle yard waste. Mulch can help retain soil moisture, suppress weeds, and improve soil health. Here’s how to create and use mulch from yard waste:
- Shred Leaves and Branches: Use a shredder or chipper to break down leaves, branches, and other yard debris into smaller pieces. Shredding speeds up decomposition and makes the mulch easier to spread.
- Apply Mulch Properly: Spread a layer of mulch around plants, trees, and garden beds. Aim for a depth of 2-4 inches, ensuring that the mulch is not piled against plant stems or tree trunks, which can cause rot.
- Replenish Mulch as Needed: Over time, mulch breaks down and integrates into the soil. Replenish your mulch layer as needed to maintain its benefits.
Recycling Yard Waste
Many communities offer yard waste recycling programs that collect and process organic materials. These programs typically provide curbside pickup or drop-off locations for yard waste. Here’s how to take advantage of these services:
- Check Local Guidelines: Contact your local waste management authority to learn about yard waste recycling programs in your area. Find out what materials are accepted and the pickup schedule.
- Prepare Yard Waste for Collection: Follow the guidelines provided by your local recycling program. This may include using designated bags or containers, bundling branches, and keeping yard waste separate from regular trash.
- Use Drop-Off Locations: If curbside pickup is not available, find out if there are yard waste drop-off locations nearby. These facilities often accept larger volumes of yard waste and may offer compost or mulch in return.
Burning Yard Waste: Pros and Cons
In some rural areas, burning yard waste is a common disposal method. However, it’s important to weigh the pros and cons and consider environmental and safety concerns:
Pros:
- Quick Disposal: Burning can quickly reduce large volumes of yard waste to ash, which can be used as a soil amendment.
- Cost-Effective: It eliminates the need for disposal fees and transportation costs.
Cons:
- Environmental Impact: Burning yard waste releases pollutants, including carbon dioxide and particulate matter, contributing to air pollution and climate change.
- Fire Hazard: Burning poses a risk of uncontrolled fires, especially during dry or windy conditions.
- Legal Restrictions: Many areas have strict regulations regarding open burning. Always check local laws and obtain necessary permits before burning yard waste.
If you choose to burn yard waste, follow these safety tips:
- Burn Only Permitted Materials: Avoid burning wet or green materials, which produce excessive smoke, as well as prohibited items like plastics and treated wood.
- Monitor the Fire: Never leave the fire unattended and have water or a fire extinguisher nearby.
- Burn in Safe Conditions: Only burn on calm, dry days and avoid burning during drought conditions or when fire danger is high.
Hiring Professional Yard Waste Removal Services
For large-scale projects or ongoing yard maintenance, hiring a professional yard waste removal service can be an efficient solution. These services provide expertise and equipment to handle yard waste disposal, saving you time and effort. Here are some benefits of hiring professionals:
- Expertise and Equipment: Professional services have the tools and knowledge to handle large volumes of yard waste efficiently. They can quickly remove debris and ensure proper disposal.
- Convenience: Hiring professionals frees up your time to focus on other tasks. They handle all aspects of yard waste removal, from collection to disposal.
- Comprehensive Services: Many yard waste removal companies offer additional services, such as tree trimming, landscaping, and garden cleanup, providing a one-stop solution for your yard care needs.
Implementing Sustainable Yard Practices
Adopting sustainable yard practices can reduce the amount of waste you generate and promote a healthier environment. Here are some tips for maintaining an eco-friendly yard:
- Grasscycling: Leave grass clippings on the lawn after mowing to decompose naturally. This practice returns nutrients to the soil, reducing the need for fertilizers.
- Native Plants: Choose native plants for your garden, as they are well-adapted to local conditions and require less maintenance. Native plants also support local wildlife and reduce the need for pesticides.
- Water Conservation: Use efficient irrigation methods, such as drip irrigation or soaker hoses, to minimize water waste. Mulching garden beds can also help retain soil moisture.
- Natural Fertilizers: Use compost and other organic fertilizers to enrich your soil naturally. Avoid synthetic chemicals that can harm beneficial insects and microorganisms.
Conclusion
Efficient yard waste disposal is essential for maintaining a beautiful, healthy yard and contributing to environmental sustainability. By planning your yard cleanup, using a yard waste dumpster rental, composting, mulching, recycling, and considering professional services, you can manage your yard debris effectively. Implementing sustainable yard practices further enhances your efforts, promoting a greener, more eco-friendly approach to yard care.
Whether you’re tackling a seasonal cleanup or a major landscaping project, these tips will help you dispose of yard waste efficiently and responsibly. Embrace these practices to keep your yard looking its best while minimizing your environmental impact.

You’ve probably come across the term Tgtune and wondered what it really means. The truth is, Tgtune has multiple uses depending on the context, which can confuse many readers. In amateur radio networks, it refers to TG Tune, a system that allows operators to switch radio talkgroups using simple DTMF commands on AllStarLink or DVSwitch platforms.
For anglers, Tgtune describes the tungsten weight system in Daiwa Slippery Dog topwater lures, enhancing casting distance and improving hook-up rates. Some sources even mention car tuning software, though those claims are largely unverified. This guide will explain each version and show you how to use it effectively.
What Is Tgtune?
Tgtune has multiple identities. In amateur radio networks, it is a TalkGroup Tune system that allows switching radio talkgroups with DTMF commands. This is mainly used on AllStarLink or DVSwitch setups to manage communications smoothly. For anglers, Tgtune refers to the tungsten weight system in Daiwa Slippery Dog lures, enhancing casting distance and lure performance. Some claim it is car tuning software for modifying ECU files, but these claims lack proof from verified purchasers or automotive forums.
Choosing the right Tgtune depends on your purpose. Amateur radio operators benefit from improved communication and mobile operator flexibility. Anglers see better results targeting predatory fish like bream, whiting, and flathead in estuaries. Those exploring car performance should rely on established platforms such as HP Tuners, AutoTuner, TunerPro, or SCT Flash rather than unverified products. The context defines your next steps.
Tgtune in Amateur Radio Networks
For amateur radio operators, TG Tune or TalkGroup Tune scripts simplify switching between radio talkgroups. Traditionally, changing talkgroups requires editing the extensions.conf file on an Asterisk system and restarting the server. With Tgtune, operators dial a DTMF command, and the system switches instantly. This saves time and keeps communication lines active during emergency nets or field operations.
Shared repeater systems benefit as well. Operators can move between talkgroups on demand without relying on administrators. Mobile operators can change networks while driving safely. Security matters, so you must implement access restrictions. Using MAC filtering or password protection prevents unauthorized access. Proper testing in controlled conditions ensures smooth operation.
Tgtune in Fishing: Daiwa’s Slippery Dog Lure
In fishing, Tgtune refers to the tungsten weight system inside Daiwa Slippery Dog topwater lures. This innovation improves casting distance while allowing the lure to sit vertically at rest. Such placement keeps hooks ready for strikes from predatory fish. Environmental regulations often prefer tungsten over lead to reduce contamination.
The walk-the-dog retrieve technique works best. Cast the 65mm lure, 3.8g weight or the 80mm lure, 6.5g weight, let it settle briefly, and twitch the rod tip while reeling slowly. This creates realistic zig-zag motion that triggers attacks from bream, whiting, and flathead in estuaries. Sensitivity through the rod helps anglers detect subtle bites. Real-world results show higher hook-up rates with this topwater lure.
Tgtune as Car Tuning Software
Some websites claim Tgtune is car tuning software that modifies ECU (Engine Control Unit) files. They promise better fuel efficiency, performance, and handling. However, no credible evidence supports these claims. Established platforms like HP Tuners, AutoTuner, TunerPro, and SCT Flash are widely recognized and backed by automotive forums and verified purchasers.
Using unverified software can damage your engine, void warranties, or create unsafe driving conditions. Always check vehicle calibration files and technical documentation before attempting tuning. Look for real-world results, screenshots, and active community support. Avoid generic claims that could harm your car.
Tgtune as a Productivity or Tech Platform
Emerging tech tools also adopt the name Tgtune. These platforms aim to optimize workflows, automate processes, or improve productivity. Businesses may use them for performance optimization or real-time monitoring. While promising, evaluation is key. Check whether features match real user experiences and whether integration with other software is smooth.
Legitimate platforms have tutorials, support channels, and feedback from multiple users. Test trial versions and compare results before committing. This ensures your investment brings actual benefits and avoids wasting time on unverified products.
Key Features and Benefits Across Different Uses
| Context | Key Features | Benefits |
| Amateur Radio | TG Tune, DTMF commands, Asterisk system | Quick talkgroup switching, emergency flexibility |
| Fishing | Tungsten weight, walk-the-dog retrieve, topwater lure | Better hook-up rates, increased casting, legal compliance |
| Car Tuning | ECU file editing, software integration | Reliable engine tuning with established platforms |
| Productivity Tools | Automation, workflow optimization | Efficiency, real-time monitoring, flexible integration |
Across all uses, Tgtune improves performance, saves time, and provides convenience. Users benefit when they understand the context.
Common Mistakes and How to Avoid Them
In amateur radio networks, skipping tests before deployment can crash the Asterisk system or break TalkGroup Tune setups. Always back up extensions.conf and start with simple commands. For anglers, confusing standard Slippery Dog lures with TG Tune models can reduce hook-up rates. Always confirm the tungsten weight model before purchase.
For car enthusiasts, trusting unverified car tuning software can ruin your engine. Stick to trusted platforms like HP Tuners, AutoTuner, or SCT Flash. Cross-check claims on automotive forums and seek input from verified purchasers to avoid costly mistakes.
How to Set Up Tgtune for Beginners
For newcomers, setting up Tgtune depends on the context. Radio operators should start by editing the extensions.conf file carefully in the Asterisk system. Follow simple DTMF commands to switch radio talkgroups without downtime. For anglers, make sure the Daiwa Slippery Dog lure is the tungsten weight version. Beginners in car tuning should explore trusted platforms like HP Tuners or TunerPro rather than unverified software. Testing in a controlled environment ensures safety and smooth performance for all uses of Tgtune.
Advanced Tips for Amateur Radio Operators
Experienced amateur radio operators can take advantage of TG Tune for emergency nets and shared repeater systems. Mobile operators benefit from preconfigured TalkGroup Tune sequences that reduce setup time. Using AllStarLink and DVSwitch efficiently allows for multiple radio talkgroups to be managed in real-time. Always document your extensions.conf updates and test new features to avoid crashes. Security settings like password protection or node-specific restrictions prevent unauthorized access and keep communications secure.
Optimizing Your Fishing Experience with Tgtune
Anglers can improve results with Daiwa Slippery Dog by mastering the walk-the-dog retrieve. Cast the 65mm lure, 3.8g weight or 80mm lure, 6.5g weight, pause briefly, and twitch the rod tip in a zig-zag motion. This mimics prey movement and triggers strikes from bream, whiting, and flathead. Using tungsten weight improves sensitivity, so you feel subtle bites. Compliance with environmental regulations ensures safe fishing. Adjusting retrieve speed based on target estuary species helps optimize hook-up rates in real-world fishing conditions.
Evaluating Car Tuning Software Claims
Many websites claim Tgtune car tuning software can enhance engine performance, fuel efficiency, or handling. However, no evidence supports these claims. Trusted platforms like HP Tuners, AutoTuner, TunerPro, and SCT Flash provide verifiable results, community feedback, and proper vehicle calibration files. Checking automotive forums and reviews from verified purchasers helps avoid scams. Avoid products that lack screenshots, tutorials, or active support. Real-world results always matter more than bold product claims.
User Insights and Reviews
Radio operators praise TG Tune for saving time during emergency nets and field operations. Mobile operators report smooth network switching on shared repeater systems. Anglers highlight Daiwa Slippery Dog with tungsten weight for improved casting distance and realistic action. Real-world results consistently show higher hook-up rates for species like bream, whiting, and flathead.
In cars, forums such as NASIOC and VWVortex warn against unverified Tgtune software. Verified users recommend platforms like HP Tuners, TunerPro, or SCT Flash for safe ECU tuning. These insights show that understanding context ensures positive outcomes across all Tgtune uses.
Cultural Significance and Growing Popularity
Tgtune has gained attention in radio, fishing, and tech communities. For amateur radio operators, it streamlines communication in AllStarLink networks. Anglers enjoy Slippery Dog lures for legal and effective topwater fishing. In automotive circles, discussions on automotive forums like NASIOC and VWVortex highlight skepticism and caution around unverified car tuning software.
The versatility of Tgtune reflects its growing cultural impact. Communities share tips, success stories, and challenges online. From field operations to estuary fishing, the term inspires innovation, practical solutions, and user engagement. Its popularity continues to rise as more people discover real-world benefits.
FAQS
What does Tgtune mean in amateur radio?
In amateur radio networks, Tgtune refers to TG Tune or TalkGroup Tune, a script that lets operators switch radio talkgroups using DTMF commands on AllStarLink or DVSwitch systems.
How does Tgtune work in fishing?
For anglers, Tgtune is the tungsten weight system inside Daiwa Slippery Dog lures. It improves casting distance and hook-up rates, especially when using the walk-the-dog retrieve technique for predatory fish like bream, whiting, and flathead.
Is Tgtune real car tuning software?
No verified evidence supports Tgtune as car tuning software. Trusted platforms like HP Tuners, AutoTuner, TunerPro, and SCT Flash provide legitimate ECU tuning and documented vehicle calibration files.
Which version of Tgtune should I use?
It depends on your purpose. Amateur radio operators use it for TG Tune setups. Anglers focus on Daiwa Slippery Dog lures. Car enthusiasts should stick with trusted tuning software for safe ECU adjustments.
Where can I find guides for Tgtune?
Radio operators can check AllStarLink forums or DVSwitch tutorials. Anglers can visit fishing tackle stores or Daiwa dealer websites. For car tuning, explore automotive forums like NASIOC and VWVortex for verified guidance.
Conclusion
Tgtune means different things depending on your context. For amateur radio operators, it is a TG Tune system that streamlines TalkGroup Tune functionality. Anglers benefit from Daiwa Slippery Dog with tungsten weight for better casting distance and hook-up rates. Car tuning claims lack verified evidence, so rely on trusted platforms like HP Tuners, TunerPro, and SCT Flash.
Understanding context ensures you choose the right Tgtune. Explore forums for setup tips, confirm products before buying, and always test new tools safely. With this knowledge, you can confidently navigate radio, fishing, and tech applications while maximizing real-world results.

Severe bleeding is one of the most common medical emergencies that can occur unexpectedly. Whether it’s from a deep cut, traumatic injury, or an accident, knowing how to treat bleeding effectively is a critical life-saving skill. Understanding how to stop severe bleeding can be the difference between life and death, especially when professional medical help is not immediately available. In this guide, we’ll walk you through the essential steps on how to treat bleeding and help you understand what to do in case of an emergency.
Why is Treating Bleeding Important?
Bleeding is the body’s natural response to injury, but when it becomes severe, it can cause significant damage. If not treated promptly, severe bleeding can lead to shock, blood loss, and even death. By stopping the bleeding quickly, you can help prevent these severe outcomes and give the injured person a better chance of survival until professional medical help arrives.
Learning how to treat bleeding properly is an essential part of first aid training. With the right knowledge and actions, anyone can provide the necessary care during a bleeding emergency.
Step 1: Assess the Situation
Before you begin treating the wound, the first step in how to treat bleeding is to assess the situation. This helps you understand the severity of the injury and make informed decisions. Here’s what you should do:
- Ensure Your Safety: Before approaching the injured person, make sure the environment is safe. Check for any hazards, such as traffic or unstable structures. If the scene is dangerous, move the person to a safer location if possible.
- Check for Severe Bleeding: Look for large, open wounds or significant blood loss. Severe bleeding is typically characterized by blood that spurts from a wound (arterial bleeding) or flows heavily (venous or capillary bleeding). If bleeding is severe, it will need immediate attention.
- Call for Help: If the bleeding is severe and uncontrollable, it’s crucial to call emergency services immediately. Alert them to the situation and provide details about the severity of the injury.
Step 2: Apply Direct Pressure
Once you’ve assessed the situation, the next step in how to treat bleeding is to apply direct pressure to the wound. This is the most effective way to stop or slow down the bleeding.
- Use a Clean Cloth or Bandage: Take a clean cloth, gauze pad, or any available fabric and press it firmly against the wound. If you don’t have a cloth, use your hand, but avoid touching the bleeding directly with bare skin if possible.
- Apply Constant Pressure: Use your hand or a bandage to apply continuous pressure to the wound. The pressure helps compress the blood vessels, reducing blood flow and allowing the body to form a clot.
- Don’t Remove the Cloth: If blood begins to soak through the cloth, don’t remove it. Instead, add more layers of cloth or gauze on top and continue to apply pressure. Removing the cloth can disrupt the clotting process and cause the bleeding to worsen.
Step 3: Elevate the Injured Area (if possible)
If the injury is on an arm or leg, elevating the injured area may help reduce blood flow to the wound and slow the bleeding. However, do not attempt to elevate the area if it causes more pain or if there is a suspected fracture. Elevating the injured area is more effective for controlling bleeding from wounds in the limbs.
- Position the Injury: If the injured person is conscious and comfortable, carefully elevate the injured arm or leg above the level of the heart.
- Monitor for Shock: While elevating the injured area may help slow bleeding, it’s important to watch for signs of shock, which can include weakness, rapid breathing, and confusion. If these signs appear, try to keep the person warm and calm while awaiting medical help.
Step 4: Apply a Tourniquet (If Necessary)
In cases of severe bleeding, especially when the bleeding cannot be controlled with direct pressure, a tourniquet may be required. This is a more advanced technique and should only be used when necessary.
- When to Use a Tourniquet: A tourniquet should be applied only in cases of severe bleeding that cannot be controlled by direct pressure, particularly for limb injuries with large blood vessels.
- How to Apply a Tourniquet: If you’re trained in its use, apply the tourniquet 2–3 inches above the bleeding site (closer to the body). Tighten it until the bleeding stops. It’s important to note the time when the tourniquet was applied, as it should not be left on for too long, as this can cause tissue damage.
- Seek Medical Attention: Tourniquets should always be applied as a last resort. Seek professional medical help immediately if you use a tourniquet.
Step 5: Treat for Shock
Severe bleeding often leads to shock, a dangerous condition where the body’s organs do not receive enough oxygen. Recognizing the signs of shock and treating the person can help prevent further complications.
- Signs of Shock: Symptoms may include pale skin, rapid heartbeat, shallow breathing, weakness, confusion, or dizziness.
- How to Treat for Shock: Lay the injured person down on their back, raise their feet (if possible), and keep them warm by covering them with a blanket or clothing. Encourage the person to stay calm and still. Do not give them anything to drink or eat.
Step 6: Monitor and Comfort the Injured Person
While you wait for medical professionals to arrive, continue to monitor the injured person’s condition. Keep the injured area elevated (if applicable), maintain pressure on the wound, and stay with the person to offer comfort and reassurance.
Step 7: Follow Up with Professional Care
Once professional help arrives, inform them of the steps you’ve taken to treat the bleeding and follow any further instructions they provide. The injured person will likely need additional care and treatment, such as stitches, blood transfusions, or more advanced medical interventions.
How to Get Certified in First Aid for Severe Bleeding
Learning how to treat bleeding properly can save a life, and the best way to ensure you’re prepared for emergencies is to get certified. The First Aid for Severe Bleeding Certification is an essential course that covers these steps in detail. Through this certification, you’ll gain valuable hands-on skills to stop severe bleeding and provide first aid in emergencies.
By completing this course, you’ll:
- Learn how to recognize and treat severe bleeding
- Master techniques like applying direct pressure and using a tourniquet
- Gain confidence in your ability to respond to traumatic injuries
- Be better equipped to handle real-world emergencies
Conclusion
Knowing how to treat bleeding is a vital skill that could save someone’s life during an emergency. By learning how to act quickly and effectively, you can stop severe bleeding, reduce the risk of shock, and provide comfort until professional help arrives. Getting certified in First Aid for Severe Bleeding through CPR Certification Now ensures that you’re well-prepared for any emergency.

Blow Pops are a fun, colorful candy many people grew up enjoying—but if you’re a parent, a calorie tracker, or someone watching sugar intake, you probably want to know what’s really inside one. This guide breaks down blow pop nutrition information in a clear, honest, and easy-to-understand way, so you can make informed choices without confusion.
What Is a Blow Pop?
A Blow Pop is a hard lollipop with bubble gum in the center. It’s known for bold flavors, bright colors, and long-lasting sweetness. Nutritionally, it falls into the category of sugar-based candy, meaning most of its calories come from carbohydrates.
Blow Pop Nutrition Facts (Per Piece)
Here’s a general look at blow pop nutrition per piece. Values may vary slightly by flavor.
| Nutrient | Approx. Amount |
|---|---|
| Calories | 60–70 |
| Total Carbohydrates | 17–18 g |
| Sugar Content | 13–15 g |
| Fat | 0 g |
| Sodium | 0–5 mg |
| Protein | 0 g |
This table reflects what you’d typically see on a blow pop candy nutrition label.
How Many Calories Are in a Blow Pop?
One Blow Pop contains around 60 to 70 calories.
All of these calories come from sugars and carbs, not fat or protein.
For calorie-conscious eaters, this makes Blow Pops a low-fat but high-sugar snack.
Blow Pop Sugar Content Explained
If you’re wondering how much sugar does a blow pop have, the answer is: quite a bit for its size.
Around 13–15 grams of sugar per pop
Nearly 3–4 teaspoons of added sugar
No fiber or protein to slow sugar absorption
This matters especially for kids, diabetics, and frequent snackers.
Blow Pop Carbs and Sugar Breakdown
From a nutrition standpoint:
Blow pop carbs: Mostly simple carbohydrates
Blow pop sugar content: The majority of total carbs
No complex carbs or fiber
Blow Pop Ingredients Explained
Common blow pop ingredients include:
Sugar
Corn syrup
Artificial flavors
Artificial colors
Gum base (center)
Citric acid
There are no fats, vitamins, or minerals in meaningful amounts. Some flavors may contain allergens depending on manufacturing, so always check the label if allergies are a concern.
Blow Pop Gum Calories: Does the Center Add More?
Yes—but only slightly.
The gum center adds a few extra calories
Still entirely sugar-based
No nutritional benefits
So when looking at blow pop gum nutrition facts, think of it as an extension of the candy, not a separate snack.
Is Blow Pop Candy Unhealthy?
Blow Pops aren’t “bad” in moderation, but they’re not nutritious.
They are:
High in added sugar
Low in nutrients
Best treated as an occasional treat
For daily snacking, healthier options exist—but as an occasional candy, portion control is key.
Are Blow Pops Bad for Teeth?
Dentists often caution against hard candies like Blow Pops because:
Sugar stays on teeth for a long time
Sticky gum can trap sugar
Increases cavity risk if eaten frequently
Rinsing with water after eating helps reduce damage.
Blow Pop Nutrition Information for Kids
For children:
One Blow Pop already meets a large portion of daily sugar limits
Frequent consumption may affect dental health
Best reserved for special occasions, not daily snacks
Parents should balance candy with meals containing protein and fiber.
Is Blow Pop Safe for Diabetics?
From an informational standpoint:
Blow Pops are high in sugar
They can cause rapid blood sugar spikes
Not ideal without medical guidance
People managing diabetes should always check with a healthcare professional before including sugary candy.
Blow Pop vs Other Lollipops Nutrition
Compared to standard lollipops:
Calories: Similar
Sugar: Similar
Unique feature: Gum center
Nutritionally, Blow Pops are not significantly better or worse than most sugar candies.
FAQ`s
How many calories are in a blow pop?
About 60–70 calories per piece, depending on flavor.
How much sugar does a blow pop have?
Roughly 13–15 grams of sugar, mostly added sugars.
What is the serving size for a blow pop?
One individual lollipop (one piece).
Does blow pop contain fat or sodium?
No fat and only trace sodium amounts.
Does blow pop contain allergens?
Most flavors don’t list common allergens, but always read the label to be safe.
Final Thoughts
Understanding blow pop nutrition information helps you enjoy treats responsibly. Blow Pops are fun, nostalgic, and flavorful—but they’re best enjoyed occasionally, especially for kids and anyone watching sugar intake.
✍️ Author Bio
Daniel Carter is an experienced content writer specializing in food, nutrition, and consumer health topics. He holds an academic background in health sciences and has written evidence-based articles for educational blogs and nutrition-focused websites.

 Cartoon11 months ago
Unlocking the Potential of Nekopoi.care: A Comprehensive Guide
- Game2 years ago
Exploring Aopickleballthietke.com: Your Ultimate Pickleball Destination
- BUSINESS2 years ago
Unraveling the Mystery of 405 Howard Street San Francisco charge on Credit Card
- HEALTH2 years ago
Wegovy: Important Information and Prescription Instructions
- BUSINESS11 months ago
What Companies Are In The Consumer Services Field
- HOME IMPROVEMENT2 years ago
Vtrahe vs. Other Platforms: Which One Reigns Supreme?
- ENTERTAINMENT2 years ago
Understanding Bunkr Album: A Comprehensive Guide
- ENTERTAINMENT2 years ago
The Ultimate Guide to MP3Juices: Free Music Download